Mera Peak (6,476m) is Nepal’s highest trekking peak and one of the most accessible high-altitude climbs in the Himalayas. It offers spectacular views of Everest, Lhotse, Makalu, and Cho Oyu without requiring advanced technical mountaineering skills, making it perfect for trekkers seeking their first Himalayan summit experience.
Introduction to Mera Peak: Nepal’s Highest Trekking Peak
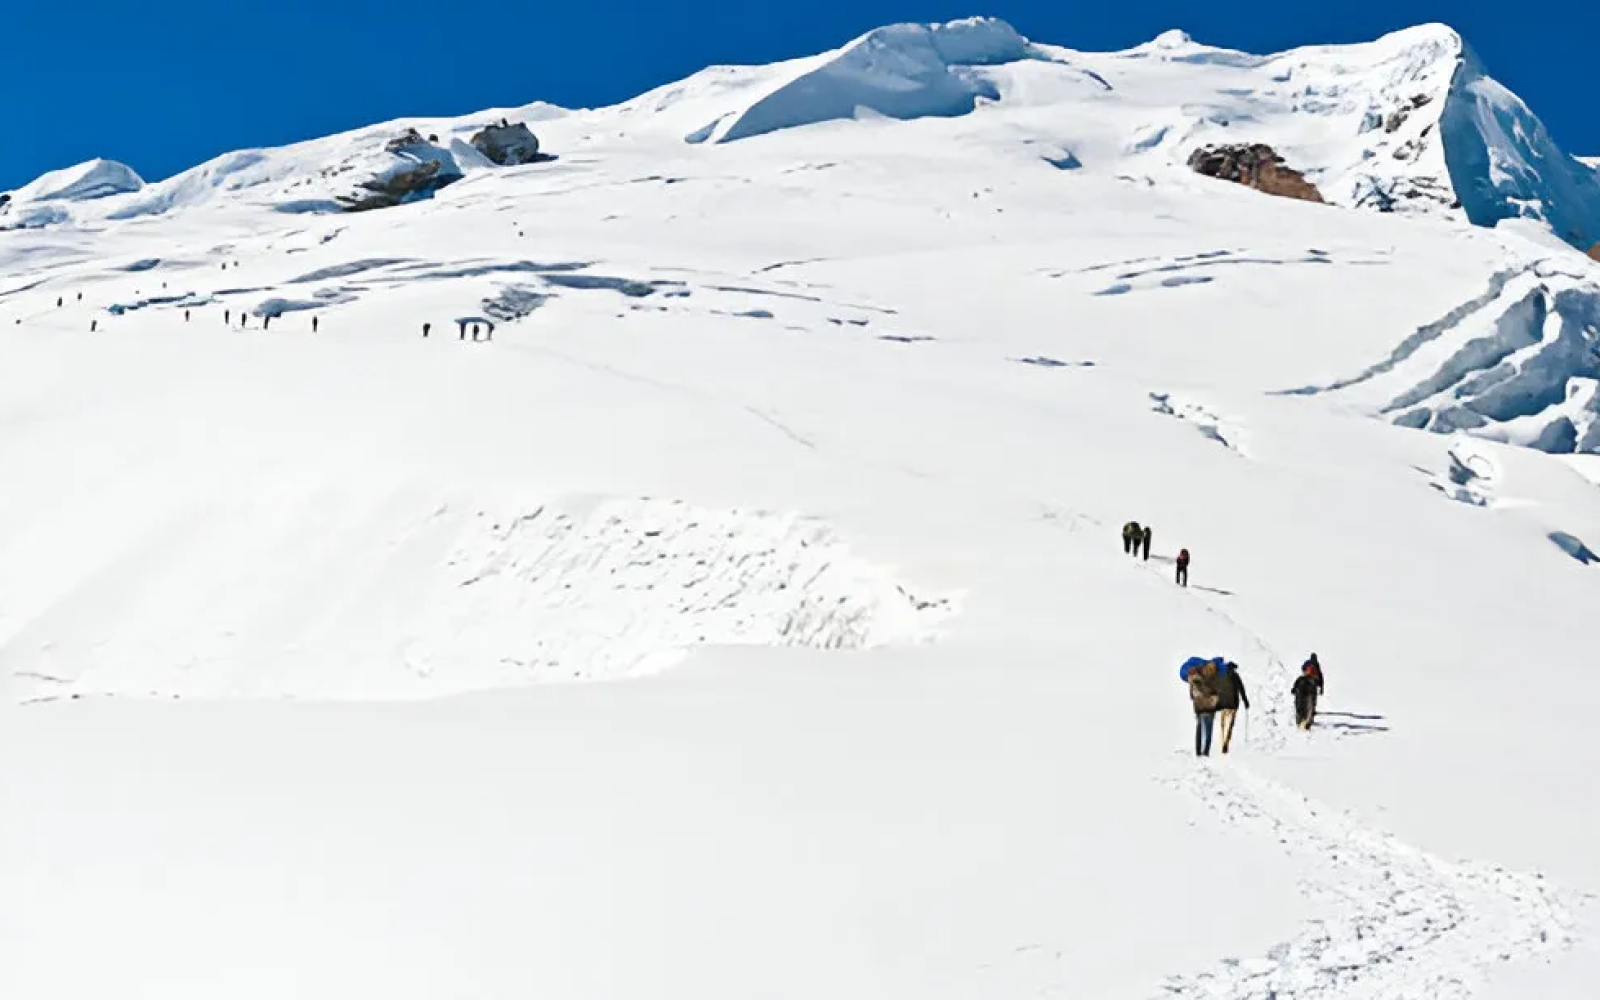
Standing tall at 6,476 meters (21,247 ft), Mera Peak is the highest trekking peak in Nepal, located in the Khumbu region to the south of Mount Everest. Unlike technical expeditions requiring extensive mountaineering expertise, Mera Peak is known for being beginner-friendly, yet still offering a thrilling Himalayan experience. It’s the perfect climb for those who want to venture into high-altitude mountaineering without the commitment of a full expedition.
The route to Mera Peak takes you through enchanting Sherpa villages, pristine alpine forests, and remote valleys, culminating in a panoramic summit view that includes five of the world’s tallest peaks—Everest, Lhotse, Cho Oyu, Makalu, and Kangchenjunga. This guide from Asiana Treks & Tours covers everything beginners need to know—from costs and permits to food, gear, and training advice.
Why Choose Mera Peak? Highlights & Challenges
Mera Peak is a popular choice for its breathtaking 360-degree Himalayan panorama, less-crowded trails compared to Everest Base Camp, and its relatively non-technical ascent. Climbers are rewarded with one of the most dramatic vistas in the Himalayas—perfect for adventurers seeking both solitude and scenery. The ascent itself, although on a glacier, involves basic ice axe and crampon skills, making it achievable with some preparation.
However, the climb is not without challenges. Altitude is the biggest hurdle, with the risk of Acute Mountain Sickness (AMS) a real concern. Climbers must take acclimatization seriously. The final summit day can be physically demanding, often requiring a pre-dawn start, long hours of walking in cold, and mental resilience. That’s why expert local guidance from companies like Asiana Treks & Tours, who prioritize safety, comfort, and cultural immersion, is invaluable.
Is Mera Peak Right for You? Experience & Fitness Level Needed
Mera Peak is often called a "trekking peak," but make no mistake—it still demands solid physical fitness and mental endurance. You don’t need previous mountaineering experience, but you should be in excellent cardiovascular condition, capable of trekking for 6–8 hours a day for multiple days. A basic understanding of walking with crampons and an ice axe can be quickly learned on-site with the help of a professional guide.
If you've done high-altitude treks like Everest Base Camp, Annapurna Circuit, or Kilimanjaro, you're well-positioned to attempt Mera Peak. Beginners are welcome, but you must be committed to training at least 2–3 months in advance. The team at Asiana Treks & Tours provides comprehensive guidance and pre-climb briefings to ensure every client is well-prepared for the ascent. Their experienced guides tailor the pace and support to each climber, making it ideal for first-timers looking to safely explore high-altitude mountaineering.
Cost of Climbing Mera Peak
The cost of climbing Mera Peak can vary depending on the length of your itinerary, the quality of services, and whether you climb independently or through a professional agency. On average, a fully guided package with a reputable local company like Asiana Treks & Tours ranges between $2,000 to $2,800 USD per person. This usually includes domestic flights, accommodation, meals, permits, porters, a licensed climbing guide, group gear, and emergency support.
Budget-conscious trekkers might consider organizing the trek independently, but this comes with higher risks and potential for logistical complications. When climbing with Asiana Treks & Tours, you gain peace of mind, quality equipment, local knowledge, and a safer, more enjoyable experience. Extra costs may include personal gear rental, tips for guides/porters, snacks, internet, and hot showers at lodges.
Mera Peak Route Overview
The standard Mera Peak route starts with a scenic flight to Lukla, followed by a gradual ascent through Paiya, Pangom, and Ramailo Danda, eventually connecting to the remote Hinku Valley. This approach offers excellent acclimatization and avoids the busier Everest Base Camp trails. Key stops include Khote, Thaknak, and Khare—the last settlement before the glacier.
From Khare, climbers undergo a basic glacier skills training session before heading to Mera High Camp at around 5,800 meters. Summit day begins before dawn and can take 8–12 hours round-trip, depending on weather and fitness. After summiting, the descent typically retraces the same path back to Lukla. Asiana Treks & Tours ensures a carefully planned itinerary with sufficient acclimatization and rest days for a successful and safe summit.
Permits Required for Mera Peak
Climbing Mera Peak legally requires three main permits:
These permits are usually arranged by your trekking agency. Asiana Treks & Tours includes all permit arrangements in their package, saving you time and hassle. Fees can vary by season—the spring and autumn seasons are more expensive than winter or summer due to higher demand. Total permit costs range from $100–$250 USD depending on the season.
Food During the Mera Peak Expedition
Food on the Mera Peak trek is both nutritious and varied, especially in the lower villages. Teahouses offer typical Nepali meals such as dal bhat (lentils and rice), noodles, fried rice, pasta, soups, and momos (dumplings). As you climb higher, options become limited but still sufficient to keep your energy up. Hydration is crucial—boiled water, tea, and soup are available at all stops.
At high camp, meals are typically prepared by the expedition cook and focus on energy-dense foods such as porridge, eggs, chapatis, energy bars, and soup. Asiana Treks & Tours prioritizes hygiene and dietary needs, offering vegetarian, vegan, and gluten-free options with advance notice. It’s also recommended to bring your own snack bars, hydration tablets, and lightweight supplements for summit day.
Essential Gear for Mera Peak Climbing
Climbers need to be prepared for extreme cold and changing weather conditions. Key clothing includes base layers, insulated jackets, windproof shell, gloves, hat, and thermal socks. Proper mountaineering boots (B2 or B3 rated), gaiters, and sunglasses with UV protection are a must for snow conditions. Personal trekking gear also includes a 4-season sleeping bag, trekking poles, and a 60–70L backpack.
Technical gear such as crampons, harness, helmet, ice axe, and ropes are provided by Asiana Treks & Tours or can be rented in Kathmandu. If you are a beginner, a gear checklist and briefing session will help you pack smart and light. Quality matters here—cheap or inadequate gear can make summit day much harder or even unsafe.
Conclusion: A Journey of a Lifetime with Asiana Treks & Tours
Climbing Mera Peak is a truly life-changing experience. From lush valleys to icy summits, it challenges your limits while offering unmatched Himalayan beauty. For beginners, the key to success is solid preparation, expert support, and an itinerary that prioritizes acclimatization and safety. With Asiana Treks & Tours, you’re not just hiring a guide—you’re joining a team of professionals who care about your journey and success.
Whether you're dreaming of your first Himalayan summit or simply want an adventure that’s off the beaten path yet achievable, Mera Peak is your gateway. Let Asiana Treks & Tours take you there—with confidence, care, and unforgettable memories.
How Much Does Mera Peak Climbing Cost? Full Budget Breakdown
Climbing Mera Peak typically costs between $2,000 and $2,800 USD per person for a fully guided 18–21 day package, depending on the time of year, level of service, and group size. Here's a breakdown of where your money goes:
| Item | Estimated Cost (USD) |
| Domestic Flights (Kathmandu–Lukla round trip) | $350–$400 |
| Mera Peak Climbing Permit (season-dependent) | $100–$250 |
| Makalu Barun National Park Entry | $30 |
| Local Municipality Fee | $20 |
| Guide and Porter Wages | $400–$600 |
| Food & Accommodation (teahouse/lodge) | $500–$700 |
| Climbing Gear Rental (if needed) | $100–$200 |
| Insurance (travel + emergency evacuation) | $100–$200 |
| Tips & Miscellaneous | $100–$150 |
A professional, all-inclusive package from Asiana Treks & Tours includes almost all of these components—permits, accommodation, guide/porter services, domestic flights, meals on the trail, and basic climbing gear. You only need to budget separately for insurance, snacks, personal gear, and tips.
Cost-Saving Tips: How to Climb Mera Peak on a Budget
While Mera Peak isn’t cheap due to its remote location and high-altitude logistics, there are smart ways to reduce your costs:
Even with a smaller budget, you can still have a safe, enjoyable, and rewarding Mera Peak climb—especially if you let a reliable local operator handle logistics and help stretch your dollar further.
Guided vs. Independent Climb: Which is More Cost-Effective?
It might seem cheaper to go independent, but in most cases, it’s not only riskier—it can also end up being more expensive in the long run. Independent climbers must arrange their permits, flights, gear, food, navigation, glacier safety, and emergency support all on their own. Not to mention, solo travel in high-altitude terrain is discouraged for safety reasons.
A guided package from Asiana Treks & Tours consolidates all the essentials—professional guidance, safe acclimatization, food, porter support, rescue coordination, and permits—into one streamlined, well-supported experience. This reduces the chances of costly mistakes, delays, or health-related problems.
In short:
For beginners, going guided is the smarter and safer financial decision, giving you peace of mind and maximum summit chances without unexpected surprises.
Where You’ll Sleep: Teahouses vs. Camping
During the Mera Peak trek, most of your nights will be spent in local teahouses, simple mountain lodges that provide basic but comfortable lodging. Teahouses are available in lower-altitude villages such as Lukla, Paiya, Pangom, Khote, Thaknak, and Khare. These accommodations typically offer twin-sharing rooms with wooden beds, foam mattresses, and thick blankets. While they’re not luxurious, they provide a warm, social environment where trekkers gather to rest and share stories.
As you approach higher elevations—particularly at Mera High Camp (around 5,800 meters)—there are no teahouses available, and the expedition shifts to tent camping. Here, Asiana Treks & Tours provides all necessary camping equipment including high-altitude tents, sleeping mats, kitchen gear, and a support crew to prepare meals and manage logistics. Though more basic, camping at high camp allows climbers to rest close to the summit and acclimatize properly before the final push. This combination of teahouse lodging and alpine camping makes the trek both comfortable and adventurous.
What You’ll Eat: Typical Meals on the Mera Peak Trek
Food during the Mera Peak expedition is surprisingly varied considering the remote terrain. In teahouses, menus generally include Nepali, Tibetan, and basic Western dishes. The most popular and nutritious option is the classic dal bhat—a lentil soup served with rice, vegetables, and pickles. It’s a high-energy meal that’s freshly made and typically offers unlimited refills, making it a favorite among trekkers.
Other common meals include noodles, pasta, fried rice, chapatis, eggs, soups, potatoes, and momos (dumplings). Breakfast options are usually pancakes, porridge, muesli, and tea or coffee. At high camp, meals are prepared by the expedition cook and are focused on easy-to-digest, high-calorie foods such as soups, instant noodles, mashed potatoes, and energy-rich snacks. Asiana Treks & Tours ensures all meals are prepared hygienically and cater to your energy needs at altitude.
Drinking Water, Snacks & Special Diets
Staying hydrated is critical during high-altitude trekking. Along the route, you’ll find boiled or filtered drinking water available at most teahouses for a small fee. It's strongly recommended to bring water purification tablets, iodine, or a SteriPEN for added safety. Asiana Treks & Tours prioritizes water safety and encourages clients to avoid bottled water to reduce plastic waste in the mountains.
For snacks, it’s best to bring your own energy bars, trail mix, chocolate, dried fruits, or electrolyte tablets, as such items are limited and expensive in high-altitude villages. If you have dietary restrictions (vegetarian, vegan, gluten-free, etc.), inform your trekking company in advance. Asiana Treks & Tours is experienced in accommodating special diets and will ensure your nutritional needs are met, even in remote locations.
Route Options to Mera Peak: Classic vs. Alternative Trails
There are two main routes to Mera Peak: the classic route via Panggom and the Hinku Valley, and an alternative route via Zatrwa La Pass. The classic trail is longer but ideal for beginners, offering a more gradual ascent and excellent acclimatization opportunities. This route travels through remote Sherpa villages like Paiya, Pangom, Ningsow, and Chhatra Khola, before joining the Hinku Valley trail. It's scenic, culturally rich, and far less crowded than the main Everest trails.
The Zatrwa La Pass route, on the other hand, is shorter and more direct. It’s often used by experienced trekkers with limited time. However, it involves a steep climb over the 4,600-meter Zatrwa La Pass early in the trek, making it less suitable for proper altitude adjustment. At Asiana Treks & Tours, we recommend the classic route for beginners, prioritizing safety, scenic diversity, and gradual elevation gain.
Day-by-Day Itinerary Overview
Standard 18-Day Itinerary with Asiana Treks & Tours
This itinerary by Asiana Treks & Tours is designed to maximize summit success, with ample acclimatization and backup weather days.
Transportation to the Trailhead: Lukla Flights & Access
The gateway to the Mera Peak trek is Lukla, a mountain airstrip at 2,860 meters. Most treks begin with a 30-minute scenic flight from Kathmandu to Lukla, offering breathtaking views of the Himalayas. Due to weather-related delays being common in Lukla, Asiana Treks & Tours always advises travelers to allow buffer days at the beginning and end of their journey.
Alternatively, some itineraries use the Ramechhap to Lukla route, which requires a 4–5 hour drive from Kathmandu followed by a shorter flight. While this helps reduce flight congestion, it does add an extra travel day. All transportation, including airport transfers and domestic flights, are arranged by Asiana Treks & Tours to ensure a smooth start to your adventure.
Acclimatization & Altitude Profile
One of the most crucial aspects of the Mera Peak climb is proper acclimatization. The trek follows a gradual ascent, with three key acclimatization points: Ningsow, Thaknak, and Khare. Day 10 is fully devoted to acclimatization and glacier training in Khare, giving your body time to adjust to the thin air before moving to high camp.
The altitude profile starts from 2,730m (Paiya) and climbs gradually to 5,800m (High Camp) before the final push to the 6,476m summit. Having a contingency day built into the itinerary is essential for flexibility in case of weather delays or slow acclimatization. Asiana Treks & Tours follows a "climb high, sleep low" approach wherever possible, minimizing the risk of altitude sickness while maximizing your chances of a successful and safe summit.
Permits You Need: Costs, Where & How to Get Them
Climbing Mera Peak requires several official permits, as it is located within a protected area and is designated as a trekking peak by the Nepal Mountaineering Association (NMA). Whether you're trekking solo or with an agency, the following permits are mandatory:
Mera Peak Climbing Permit (via NMA):
Makalu Barun National Park Entry Permit:
Pasang Lhamu Rural Municipality Fee (Local Entry Permit):
These permits are typically handled by your trekking company. At Asiana Treks & Tours, all required permits are included in your package, so you don’t need to queue at offices or worry about paperwork. If you’re trekking independently (which is not recommended for Mera Peak), you must visit the Nepal Tourism Board in Kathmandu and the NMA office to secure these permits—this process can take several hours and is often confusing for first-timers.
Hiring a Guide or Porter: Rules & Recommendations
As of recent updates to Nepal’s trekking regulations, it is mandatory for all foreign trekkers to hire at least a licensed guide when venturing into restricted or high-risk areas like Mera Peak, particularly above 5,000 meters. This is to ensure your safety, promote responsible tourism, and support local livelihoods.
Hiring a guide or porter is not just a regulation—it’s also a wise investment. A certified guide from Asiana Treks & Tours will help you navigate routes, monitor your health, manage altitude-related issues, and even coordinate rescue operations if needed. Porters, meanwhile, ease your physical burden by carrying 20–25 kg of your gear, allowing you to conserve energy for summit day.
For Mera Peak, Asiana Treks & Tours recommends:
All guides and porters employed by Asiana Treks & Tours are insured, experienced, and trained in high-altitude safety. Supporting them also contributes to the local economy and makes your expedition more enjoyable, secure, and culturally enriching.
Essential Gear for Mera Peak: Complete Packing List
Climbing Mera Peak (6,476m) requires a strategic approach to gear—you’ll need to pack for everything from mild hiking weather to sub-zero summit conditions. Being properly equipped can make the difference between a safe, successful ascent and a miserable or even dangerous experience. Here's a high-level breakdown of what to bring:
Personal Trekking Gear:
Clothing:
This packing list is fully supported by Asiana Treks & Tours, and we also provide a pre-trip gear check in Kathmandu before your departure.
What to Rent vs. What to Buy
If you're climbing Mera Peak for the first time, you don’t need to buy everything new. Many items can be rented in Kathmandu at affordable prices, saving you money and luggage space. Asiana Treks & Tours can help you source high-quality rental gear from trusted local shops.
Recommended Rentals:
Best Items to Buy Yourself:
Buying the gear you’ll reuse on future adventures makes sense, but renting technical gear for one-time use is more practical and cost-effective, especially with local rental shops offering daily or trip-based rates.
Clothing for Cold Weather & Summit Push
The summit day on Mera Peak typically starts around 2:00–3:00 AM in freezing, high-altitude conditions. Temperatures can drop below -20°C (-4°F) with wind chill, so your clothing system must be layered, insulated, and weatherproof.
Suggested Summit Clothing Setup:
Layering is key—this allows you to adjust warmth as your activity level and conditions change throughout the summit climb.
Technical Equipment: Crampons, Ice Axe & More
While Mera Peak is considered a non-technical trekking peak, the final section involves crossing glaciers and snow slopes that require basic mountaineering gear. You don't need advanced climbing skills, but using the gear correctly is essential for your safety. Training and instruction are provided during your acclimatization days in Khare by Asiana Treks & Tours' certified guides.
Essential Technical Gear:
Asiana Treks & Tours provides all necessary group gear and offers rental options for technical personal items. Our team ensures that all clients are comfortable using this equipment through a pre-summit skills session, especially helpful for first-time climbers.
Mobile Network Coverage on the Trail
Mobile connectivity on the Mera Peak trail is limited and inconsistent, especially as you move deeper into the Hinku Valley and gain elevation. In the lower sections of the trek (such as Lukla, Paiya, and Pangom), you may receive a weak signal from Nepal Telecom (NTC) or NCELL, but service is often unreliable and weather-dependent.
After crossing into more remote areas like Kothe, Thaknak, Khare, and beyond, mobile signals become sporadic to non-existent. Therefore, it’s best to assume that you’ll be off the grid for the majority of the trek. At Asiana Treks & Tours, we inform clients in advance and encourage notifying family or friends about expected communication blackouts before departure.
Internet, Wi-Fi & Power: Charging Your Devices
Wi-Fi access is available at some teahouses in lower villages such as Lukla and Kothe, but it's usually slow, expensive, and powered by solar or small hydroelectric systems. In more remote areas like Khare, you may still find paid Wi-Fi (around $5–$10 per hour), but reliability is a major issue. Beyond Khare—such as at Mera High Camp or on summit day—there is no internet access at all.
Charging your devices (phones, cameras, GPS watches, etc.) is possible at most teahouses, but it comes at a cost. Rates range from $2 to $5 per device per charge, and power is typically solar-based. Asiana Treks & Tours recommends that climbers bring power banks and solar chargers to stay powered for longer durations. Also, carrying spare batteries for headlamps and essential devices is crucial.
Emergency Contacts & Satellite Communication Options
For safety and coordination, Asiana Treks & Tours equips all climbing groups with emergency communication tools, especially once you move above Khare. While mobile networks aren’t reliable, our guides carry satellite phones or Garmin inReach devices, allowing for emergency contact with base support or helicopter services if needed.
In the event of altitude sickness, injury, or severe weather, the guide can communicate directly with Kathmandu for emergency evacuation, often coordinated via rescue helicopters (if your insurance covers it). We also maintain a 24/7 operations team in Kathmandu for real-time updates and response.
For personal use, you may bring your own satellite communicator, but it’s not required if you’re trekking with us. If you're traveling solo or independently (not recommended), having a satellite device is highly advised for any form of reliable contact.
Best Time to Climb: Spring vs. Autumn
The two best seasons to climb Mera Peak are Spring (March to May) and Autumn (late September to November). Both offer stable weather, clear skies, and better summit success rates, making them ideal for beginners and experienced climbers alike.
Spring (March–May) is especially popular among climbers. The temperatures are warmer, the days are longer, and the high-altitude flora begins to bloom, adding vibrancy to the lower trails. Spring is also preferred for its gentler snow conditions on the summit approach, though occasional snowstorms can still occur at high altitudes.
Autumn (late September–November) is another prime window for climbing. The post-monsoon air is crisp and clear, offering unmatched Himalayan views, including Everest, Makalu, and Lhotse. The trails are dry, and temperatures are cool, especially above 4,000m. This is the busiest season in the Nepal trekking calendar, so expect more foot traffic and early booking needs.
Weather Patterns & Temperature Overview
Understanding the weather conditions on Mera Peak is essential for a safe and successful climb. Below is a general idea of what to expect:
Lower elevations (2,800m–4,000m):
Mid-altitude camps (4,000m–5,000m):
High Camp & Summit (5,800m–6,476m):
Both spring and autumn generally provide low winds and fewer clouds, which are critical factors when attempting a summit at over 6,000 meters. Asiana Treks & Tours’ experienced guides closely monitor weather updates and make schedule adjustments to prioritize your safety and summit chances.
Off-Season Considerations: Winter & Monsoon Risks
While it’s possible to climb Mera Peak in the off-seasons—Winter (December–February) and Monsoon (June–August)—these periods pose increased risks and logistical challenges, especially for beginners.
In winter, the trails and high camps are often buried in deep snow, temperatures plunge well below -25°C, and teahouses at higher altitudes may be closed. Technical skills, experience, and cold-weather resilience become essential in this season. Few companies operate during this time, but Asiana Treks & Tours can arrange custom expeditions for experienced clients seeking solitude and challenge.
Monsoon season is the least recommended time for Mera Peak. Heavy rainfall leads to landslides, slippery trails, leech-infested paths, and poor visibility. Flights to Lukla are frequently delayed or canceled due to dense cloud cover. The summit becomes extremely risky due to unstable snow and weather unpredictability.
Unless you’re a highly experienced mountaineer seeking a unique challenge, it’s best to stick to spring or autumn, when nature and the mountain both work with you rather than against you.
How to Physically Prepare for Mera Peak
Climbing Mera Peak (6,476m) requires a solid level of physical fitness, even though it’s technically a trekking peak. The trek itself spans nearly two weeks of hiking through varied terrain, with a final summit day involving 8–12 hours of high-altitude exertion. To succeed and stay safe, preparation should start at least 8–12 weeks before your trip.
Your training plan should include:
Mera Peak is not a technical climb for most of the route, but the final push across snow-covered terrain and glaciers requires stamina. Asiana Treks & Tours offers a pre-climb training session in Khare, covering crampon use, rope techniques, and basic glacier safety.
Mental Preparation & Trekking at High Altitude
High-altitude trekking is as much a mental challenge as a physical one. You’ll face long days of hiking, cold mornings, potential altitude symptoms, and moments of fatigue. Developing the right mindset can make a huge difference in how you experience the climb.
Practice mental endurance by doing long hikes in unpredictable weather or carrying heavier loads. Learn to stay calm under pressure, and adopt a flexible attitude. You’ll also need to pace yourself—slow, steady trekking and controlled breathing help avoid exhaustion and altitude issues.
Most importantly, be prepared to listen to your body and follow your guide’s advice. At high altitudes, you may experience headaches, nausea, or insomnia—these are common but manageable if handled properly. Asiana Treks & Tours’ experienced guides are trained to monitor clients for signs of Acute Mountain Sickness (AMS) and will adjust the itinerary if needed to prioritize your health.
Travel Insurance for High-Altitude Climbing
Travel insurance is not optional for Mera Peak—it’s mandatory. You must have a policy that covers high-altitude trekking and emergency helicopter evacuation up to at least 6,500 meters. This coverage is essential in case of altitude sickness, accidents, or unexpected illness during your expedition.
When purchasing insurance, make sure it includes:
Asiana Treks & Tours recommends providers like World Nomads, Global Rescue, or Travel Guard, but always confirm that your specific plan includes mountaineering activities up to Mera Peak’s elevation. Bring both a digital and printed copy of your insurance certificate, and give a copy to your guide before the trek begins.
Booking in Advance vs. On Arrival in Kathmandu
You have two primary options when planning your Mera Peak expedition: booking in advance from your home country or arranging it after arrival in Kathmandu. Both approaches have pros and cons, but if you’re a beginner, booking in advance is strongly recommended.
Booking early allows you to:
At Asiana Treks & Tours, we offer flexible, fully customizable packages and provide detailed pre-trip guidance via email or video call. For travelers arriving in Kathmandu without prior arrangements, we can still accommodate late bookings—but availability may be limited during peak season, and you’ll have less time for acclimatization planning.
Booking in advance not only gives peace of mind but also ensures a better-organized, safer, and more enjoyable expedition from start to summit.
Where to Stay, Gear Shop & Prepare in Kathmandu
Kathmandu is your gateway to Mera Peak and a vital spot for final preparations before heading into the mountains. Whether you arrive days ahead or just before your trek, staying in Thamel, the city’s tourist hub, offers convenience and easy access to everything you need.
Asiana Treks & Tours recommends choosing accommodation close to Thamel’s main streets, where you’ll find a variety of hotels and guesthouses ranging from budget to mid-range and luxury. Staying nearby means you can easily attend our pre-trek briefing, meet your guide, and double-check your gear with our support team.
Kathmandu is also the best place to get last-minute supplies, medical needs, and trekking permits. We assist with all paperwork, but you can also visit the Nepal Mountaineering Association (NMA) office for permits or the Tourism Board for additional documentation.
Where to Buy or Rent Equipment in Thamel
Thamel boasts a wide selection of outdoor gear shops, offering everything from high-quality down jackets to technical climbing equipment. If you forgot to bring something or prefer to rent to save luggage space, this is the best place to do it.
Popular gear rental shops include:
Asiana Treks & Tours partners with trusted local gear providers and can help arrange rentals so you get quality equipment that fits well and is safe for high-altitude use. We recommend testing gear for fit and comfort before the trek begins.
Things to Do in Kathmandu Before & After Your Climb
Kathmandu offers a vibrant cultural experience and is a great place to relax and acclimatize either before or after your Mera Peak adventure. Some popular activities include:
Spending a day or two in Kathmandu not only enhances your trip with cultural richness but also helps your body adjust to altitude before you head to Lukla. Asiana Treks & Tours can arrange guided city tours or recommend places based on your interests and schedule.
Choosing a Guide or Trekking Agency: What to Look For
When climbing Mera Peak, your guide and trekking agency are your lifeline on the mountain. Choosing the right team can greatly influence your safety, comfort, and overall experience. Look for agencies like Asiana Treks & Tours that have a strong reputation, certified and experienced guides, and good client reviews.
A quality guide should be familiar with the route, weather patterns, and altitude-related health issues. They should also be trained in basic first aid, rescue procedures, and technical climbing skills for the summit push. Agencies that offer personalized attention, small group sizes, and solid logistical support typically deliver the best experiences.
Additionally, transparent communication about costs, inclusions, and expectations is key. Asiana Treks & Tours prides itself on clear, upfront service and dedicated client care, ensuring your trek is both safe and enjoyable.
Typical Crew: Guide, Porter, Cook – Roles & Tips
Most Mera Peak expeditions include a guide, porters, and sometimes a cook, especially for camping or full-service trekking. Each member plays a critical role:
Respecting your crew is crucial. Treat them kindly, communicate openly, and be mindful of their workload. Tipping generously and thoughtfully (see below) is an important way to show appreciation.
Tipping Culture on the Mountain
Tipping is a customary and significant part of the trekking culture in Nepal. Your guide, porter, and cook rely heavily on tips as part of their income, and it’s a meaningful way to acknowledge their hard work and dedication during your expedition.
Typical tipping amounts vary but a general guideline for Mera Peak is:
Tips are usually pooled and distributed at the end of the trek, but you can also tip individually throughout. When tipping, consider the quality of service, group size, and difficulty of the climb. It’s customary to give tips in cash and in Nepali rupees if possible.
Asiana Treks & Tours provides guidance on tipping etiquette during the pre-trek briefing to ensure you feel comfortable and informed about this tradition.
Altitude Sickness: Symptoms, Prevention & Treatment
Altitude sickness, or Acute Mountain Sickness (AMS), is the most common health risk on Mera Peak due to rapid ascent above 4,000 meters. Symptoms include headache, nausea, dizziness, fatigue, and shortness of breath. In severe cases, it can escalate to High Altitude Pulmonary Edema (HAPE) or High Altitude Cerebral Edema (HACE), which are life-threatening.
Preventing altitude sickness involves gradual acclimatization, which is built into the Mera Peak itinerary with rest days at key elevations like Khare. Staying hydrated, avoiding alcohol, and eating light but nutritious meals also help. Medication such as Acetazolamide (Diamox) can be prescribed by your doctor to speed acclimatization but should be used under medical guidance.
If symptoms worsen, descending immediately is the most effective treatment. Our guides from Asiana Treks & Tours are trained to monitor clients closely and will recommend rest, medication, or evacuation if necessary, ensuring your safety remains the top priority.
Vaccinations & Travel Health Precautions
Before traveling to Nepal for Mera Peak, consult your healthcare provider about recommended vaccinations. Commonly advised vaccines include Typhoid, Hepatitis A & B, Tetanus, and Rabies. Routine immunizations such as MMR, Polio, and Influenza should be up to date.
Due to the risk of traveler’s diarrhea, it’s advisable to practice food and water hygiene rigorously—drink only bottled or purified water and eat well-cooked food. Carrying a supply of antidiarrheal medication and oral rehydration salts is prudent.
Asiana Treks & Tours also recommends bringing sunscreen, sunglasses with UV protection, and lip balm to protect against intense sun exposure at high altitudes.
Emergency Evacuation & Helicopter Rescue Process
Despite thorough preparation, emergencies can happen. In case of serious altitude sickness, injury, or illness, helicopter evacuation is the fastest way to get to advanced medical care in Kathmandu.
Our team coordinates directly with rescue operators and hospitals. Once a medical emergency is identified, the guide communicates with the base camp and arranges a rescue helicopter, which can usually reach the high camps within hours, weather permitting.
It is critical to have insurance coverage that includes helicopter evacuation (which we verify before the trek begins). We also advise clients to carry a personal medical kit and share their emergency contacts with our operations center.
Trekking First Aid Kit Checklist
Packing a well-stocked first aid kit is essential for Mera Peak. Here’s a recommended list of items you should carry or have accessible:
Asiana Treks & Tours provides a standard medical kit for group use and offers guidance on personal kit essentials during the pre-trek briefing.
Photography Tips for Mera Peak
Mera Peak offers breathtaking panoramic views of some of the world’s tallest mountains, making it a paradise for photography enthusiasts. To capture the best shots, bring a lightweight but durable camera or a smartphone with good zoom capabilities. Early mornings and late afternoons provide the most dramatic lighting, with warm golden hues highlighting snow-capped peaks.
Remember to protect your equipment from cold and moisture—carry your camera in padded cases and use lens cloths to prevent fogging. On the summit day, prioritize safety over photography; use quick shots and focus on capturing key moments like the panoramic view, your team, and the peak itself. Also, don’t forget to take candid shots of local people, vibrant prayer flags, and the rugged trail to tell the full story of your journey.
Local Culture & Sherpa Communities Along the Way
As you trek to Mera Peak, you’ll pass through villages inhabited by Sherpa and other Himalayan ethnic groups. The Sherpa community is known for its rich cultural heritage, warm hospitality, and deep spiritual connection to the mountains. Visiting local monasteries and stupas gives you a glimpse into their Buddhist traditions, which emphasize respect for nature and life.
Engage respectfully by greeting locals with a friendly “Namaste” and observing customs such as removing shoes before entering homes or religious sites. Many villages offer simple tea houses where you can interact with Sherpa families and learn about their way of life. These cultural exchanges enrich your trek, making it more than just a physical challenge but also a meaningful journey into Himalayan traditions.
Respectful Trekking: Environment & Cultural Etiquette
Respect for the environment and local culture is vital when trekking Mera Peak. Minimize your impact by carrying out all trash, avoiding single-use plastics, and staying on marked trails to prevent soil erosion. Use eco-friendly products and conserve water whenever possible, as resources in remote villages are limited.
Cultural etiquette includes dressing modestly when visiting villages or religious sites, asking permission before photographing people, and supporting local businesses by purchasing handicrafts or food locally. By trekking responsibly, you help preserve the natural beauty and cultural richness of the region for future generations.
Asiana Treks & Tours educates all clients on sustainable and respectful trekking practices, ensuring that your adventure contributes positively to the environment and communities you encounter.
What to Do After You Summit
Reaching the summit of Mera Peak is a monumental achievement, and after descending back to Khare or base camp, it’s important to give yourself time to rest and reflect. Many climbers feel a mix of exhilaration, fatigue, and relief, so taking a day to relax and recover is highly recommended before continuing your trek or traveling onward.
Celebrate your success with your team and guides, sharing stories and photos. This downtime is also a good opportunity to address any minor injuries or soreness. Hydrate well, eat nourishing meals, and get quality sleep to aid your recovery. Asiana Treks & Tours organizes farewell dinners or small ceremonies to honor your accomplishment and the hardworking crew who supported you.
Returning to Kathmandu: Flights, Delays & Buffer Days
The journey back to Kathmandu from Lukla can sometimes be unpredictable due to weather conditions. Flights into and out of Lukla are notoriously affected by fog, wind, and visibility issues, leading to delays or cancellations.
It’s wise to build in buffer days at the end of your itinerary to accommodate potential flight disruptions. This flexibility reduces stress and gives you a chance to explore more of the Everest region if you have time. Asiana Treks & Tours closely monitors weather forecasts and flight schedules, assisting clients with rearrangements when necessary.
If flights are delayed, you’ll stay overnight in Lukla or nearby villages with comfortable accommodations arranged by our team, ensuring your safety and comfort during unexpected wait times.
Souvenirs & Sustainable Shopping in Nepal
Kathmandu is an excellent place to pick up meaningful souvenirs that support local artisans and communities. Popular items include handwoven woolen garments, prayer flags, Thangka paintings, traditional jewelry, and handcrafted pottery.
When shopping, look for fair-trade and ethically made products that directly benefit Nepali craftsmen. Avoid mass-produced souvenirs or items made from endangered wildlife or unsustainable materials. Your purchases can contribute to preserving cultural heritage and promoting sustainable livelihoods.
Asiana Treks & Tours can recommend trusted shops and cooperatives that uphold these values, helping you bring home authentic keepsakes with a positive impact.
Getting to Nepal: International Flights to Kathmandu (KTM)
Kathmandu’s Tribhuvan International Airport (KTM) is the main gateway for international travelers heading to Mera Peak. Major airlines from Asia, the Middle East, and Europe operate regular flights to Kathmandu. Depending on your origin, you may have a direct flight or require a connection via hubs like Doha, Delhi, or Bangkok.
It’s advisable to book your international flight well in advance, especially if traveling during peak trekking seasons in spring (March-May) and autumn (September-November). Upon arrival, you’ll need to clear customs and immigration, then transfer to your accommodation in Thamel or nearby areas. Asiana Treks & Tours can arrange airport pickups to make this transition seamless.
From Kathmandu to Lukla: Flight, Cost & Alternatives
The journey to the trailhead begins with a short but scenic flight from Kathmandu to Lukla Airport (Tenzing-Hillary Airport), the gateway to Mera Peak and Everest region treks. The flight lasts about 30-40 minutes and offers stunning aerial views of the Himalayas.
Flight costs range from $160 to $200 USD one-way, depending on the season and availability. These flights operate early in the morning due to weather constraints and are often booked months in advance.
As an alternative, adventurers sometimes opt for an overland journey to Phaplu by jeep or bus, followed by a trek to Lukla. Though significantly longer and more challenging, this route offers a unique cultural experience and a chance to acclimatize gradually.
Lukla Flight Delays & Cancellations: What to Expect
Flights to and from Lukla are highly weather-dependent, with frequent delays or cancellations due to fog, wind, or poor visibility. It’s common for travelers to experience waits ranging from a few hours to several days.
To minimize disruption, build buffer days into your itinerary. Your guide and agency will keep you updated and assist with rebooking flights or arranging accommodations in Lukla if needed. Patience and flexibility are crucial when flying in and out of this challenging mountain airport.
Overland Option: Jeep or Bus to Phaplu + Trekking to Lukla
For those looking to avoid Lukla’s unpredictable flights, traveling overland to Phaplu is an option. The jeep or bus ride from Kathmandu to Phaplu takes approximately 10-12 hours over mountainous roads.
From Phaplu, it’s a 3-4 day trek to Lukla through picturesque villages and forests, allowing for gradual acclimatization. This route is less popular due to its length and difficulty but appeals to trekkers seeking a less commercialized experience.
Domestic Transportation in Nepal: Taxis, Buses & Apps
Within Kathmandu and nearby towns, transportation options include taxis, microbuses, and rickshaws. Metered taxis are available but often require negotiation on fares. Apps like Pathao and TaxisNepal offer convenient booking with upfront pricing.
For longer domestic travel, tourist buses provide affordable but slower journeys. Private car rentals with drivers are also common and can be arranged through your trekking agency for comfort and flexibility.
Airport Transfers, Luggage Handling & Storage Tips in Kathmandu
Most travelers benefit from airport pickup services provided by agencies like Asiana Treks & Tours, which ease the transition from plane to hotel. When heading to the trail, luggage handling at airports and in Kathmandu is straightforward but be mindful of weight limits for domestic flights (usually around 15 kg).
If you want to lighten your load, many hotels and guesthouses in Kathmandu offer secure luggage storage while you’re trekking. This allows you to leave non-essential items behind safely.
Travel Time Estimates Between Major Points (Kathmandu – Lukla – Mera Base Camp)
Understanding these timeframes helps with realistic itinerary planning and ensuring you have enough rest and acclimatization days to stay safe and enjoy your climb.
Kathmandu (1,400m) – Starting Point
Your journey begins in Kathmandu, Nepal’s bustling capital city. Here, you’ll finalize permits, meet your guide and team, and prepare your gear. Kathmandu offers a blend of ancient culture and modern amenities, perfect for last-minute shopping and acclimatization before heading into the mountains.
Lukla (2,860m) – Gateway to the Himalayas
Lukla, home to the world-famous Tenzing-Hillary Airport, is your gateway to the Everest region and Mera Peak. It’s a small but vibrant mountain town filled with lodges, tea houses, and trekking outfitters. After a scenic but sometimes turbulent flight, Lukla marks the true start of your trekking adventure.
Paiya (3,200m)
Paiya is the first overnight stop on the trail from Lukla. It’s a quiet settlement with basic tea houses that offer warm meals and a place to rest. The scenery starts shifting here, with rugged hills and forests providing a gentle introduction to higher altitudes.
Panggom (3,350m)
From Paiya, you trek to Panggom, a small village known for its panoramic views of surrounding peaks and the Dudh Kosi river valley. The terrain begins to get steeper, and trekkers start to feel the altitude’s effects. Tea houses here provide simple accommodations and local cuisine.
Ningsow (3,500m)
Ningsow is a crucial acclimatization stop. This peaceful hamlet offers stunning views of Mera Peak’s south face and the surrounding Himalayan range. Rest days here help your body adjust to higher elevations while enjoying local hospitality.
Chhatra Khola (3,800m)
Chhatra Khola is a small settlement near the river, named after the local stream. It serves as a brief stopover before ascending further. The environment becomes more alpine, with fewer trees and more rocky terrain. Tea houses provide basic lodging.
Kothe (4,200m)
Kothe marks a significant milestone where the landscape transitions to alpine meadows and glaciers. It’s a good acclimatization point with several teahouses and lodges. The views of Mera Peak grow more dramatic, and the air thinner, signaling the start of the high-altitude phase of the trek.
Thaknak (4,600m)
At Thaknak, you’re well into the high mountain zone. The village is small but equipped with basic lodges catering to climbers. It offers stunning views of neighboring peaks like Ama Dablam and provides an excellent base for acclimatization hikes.
Khare (5,000m) – Main Base Camp
Khare is the main base camp for Mera Peak climbers. It’s a rugged high-altitude village with lodges that serve as the launching point for summit attempts. Climbers spend time here acclimatizing, training, and preparing their gear. Despite the sparse environment, Khare has a warm, communal atmosphere.
Mera High Camp (5,400m)
The final camp before the summit, Mera High Camp is located on a glacial moraine. From here, climbers begin their summit push in the early hours, facing technical snow and ice terrain. The camp offers stunning sunrise views over the Himalayas, including Everest, Lhotse, and Makalu.
Mera Peak Summit (6,476m) – The Ultimate Goal
The summit of Mera Peak is the highest trekking peak in Nepal and offers one of the most spectacular 360-degree panoramas of the Himalayan giants. On a clear day, climbers are rewarded with views of Everest, Kanchenjunga, Cho Oyu, Lhotse, and Makalu — an unforgettable experience and the pinnacle of your adventure.
1. What is the best time to climb Mera Peak?
The ideal climbing seasons are spring (March to May) and autumn (September to November). These months offer stable weather, clear skies, and moderate temperatures. Winter is very cold with heavy snow, while the monsoon season (June to August) brings heavy rainfall and increased risk of avalanches.
2. Do I need prior climbing experience to summit Mera Peak?
No technical climbing experience is required, making Mera Peak accessible to fit and motivated trekkers. However, basic mountaineering training, such as using crampons and ice axes, is necessary and provided by guides during acclimatization days. Good physical fitness and stamina are essential.
3. What permits are required for Mera Peak climbing?
You need several permits, including the TIMS (Trekkers’ Information Management System) card, Sagarmatha National Park Permit, and a Mera Peak climbing permit issued by the Nepal Ministry of Tourism. Your trekking agency, like Asiana Treks & Tours, will help you arrange these before the trek.
4. How much does it cost to climb Mera Peak?
Costs vary depending on whether you trek independently or with a guide, but on average, a guided Mera Peak expedition ranges from $2,500 to $4,000 USD. This includes permits, guides, food, accommodation, and equipment rentals. Flights, insurance, and personal expenses are extra.
5. What level of fitness do I need?
You should have good cardiovascular fitness, endurance, and leg strength to handle long trekking days and high altitude. Training for several months prior, including hiking, stair climbing, and cardio workouts, is highly recommended to increase your chances of success and enjoyment.
6. What gear do I need for the climb?
Essential gear includes insulated jackets, trekking boots, gloves, headlamps, sleeping bags, crampons, and an ice axe. Many technical items can be rented in Kathmandu or Lukla. Asiana Treks & Tours provides a detailed packing list and can assist with equipment rental.
7. Is altitude sickness a concern?
Yes, altitude sickness is a significant risk above 3,000 meters. Proper acclimatization, hydration, and slow ascent are key preventive measures. Guides monitor climbers for symptoms and can recommend medication or evacuation if needed.
8. How long does the trek take?
The typical Mera Peak expedition lasts about 16 to 18 days, including acclimatization, summit day, and buffer days for weather or delays.
9. Can I climb Mera Peak independently or do I need a guide?
Technically, independent climbing is possible but not recommended for beginners due to safety concerns and permit requirements. Hiring a professional guide and support team enhances safety, navigation, and overall experience.
10. What food can I expect on the trail?
Meals consist of typical Nepali dishes like dal bhat (lentil soup with rice), noodles, soups, and occasional western options like pasta and eggs. High-calorie snacks and energy bars are advisable for the climb.

The cost of climbing in Nepal varies significantly based on the type of peak, the season, group size, and administrative fees set by the government. Trekking Peak permits range from USD 70 to USD 250 per person, depending
Explore on a spiritual and alpine adventure through the hidden treasures of the lower Solukhumbu region, where ancient Tibetan Buddhist culture meets some of the most breathtaking Himalayan landscapes. Organized by Asiana Treks & Tours, this journey offers a perfect blend of sacred pilgrimages,
Nepal is world-renowned as one of the best destinations for peak climbing, attracting adventurers from all over the globe eager to challenge themselves in the Himalayas. The country offers a wide range of climbing opportunities, from beginner-friendly trekking


 (2)
(2)  100% recommend (0)
 (0)
(0) 


